
Introduction
A film prosthetic holds up in close-up when its edges, texture, colour and movement are designed for the lens, the lighting and the performer. Realism comes from sculpting, material choice, painting, application and continuity working together.
In close-up shots, every element is exposed — texture, edges, color, movement, skin translucency, surface finish, and the way materials react to light. That is why designing prosthetics for film requires both artistic precision and technical understanding of real on-set conditions.
Creating realistic film prosthetics is not just about sculpting detail — it is about understanding how those details behave on camera. Close-up shots are especially demanding, exposing every edge, texture, pore, wrinkle, color transition, and connection between real skin and artificial material. What looks convincing in person can quickly fall apart under studio lighting, high-resolution lenses, macro shots, or repeated camera angles.
A believable prosthetic must be designed for the actor, the scene, the camera, and the production workflow. It needs to support performance, stay comfortable enough to wear, remain stable during movement, and blend naturally with the actor’s skin tone, facial structure, and expression. In film prosthetics, realism depends on how well sculpting, material choice, painting, application, lighting, and continuity work together.
This is especially important for injury effects, aging makeup, scars, wounds, burns, swelling, character transformations, trauma effects, creature features, and subtle facial alterations. In each case, the goal is not to create a perfect object, but a camera-ready prosthetic that feels organic, imperfect, and alive within the frame.
For practical effects studios, close-up realism starts before fabrication. The team must understand the script, shot size, performance needs, shooting schedule, lens distance, lighting style, skin contact, sweat, movement, and whether the prosthetic will be touched, stretched, damaged, removed, or reset during the shoot. These production details influence every creative and technical decision.

Best production
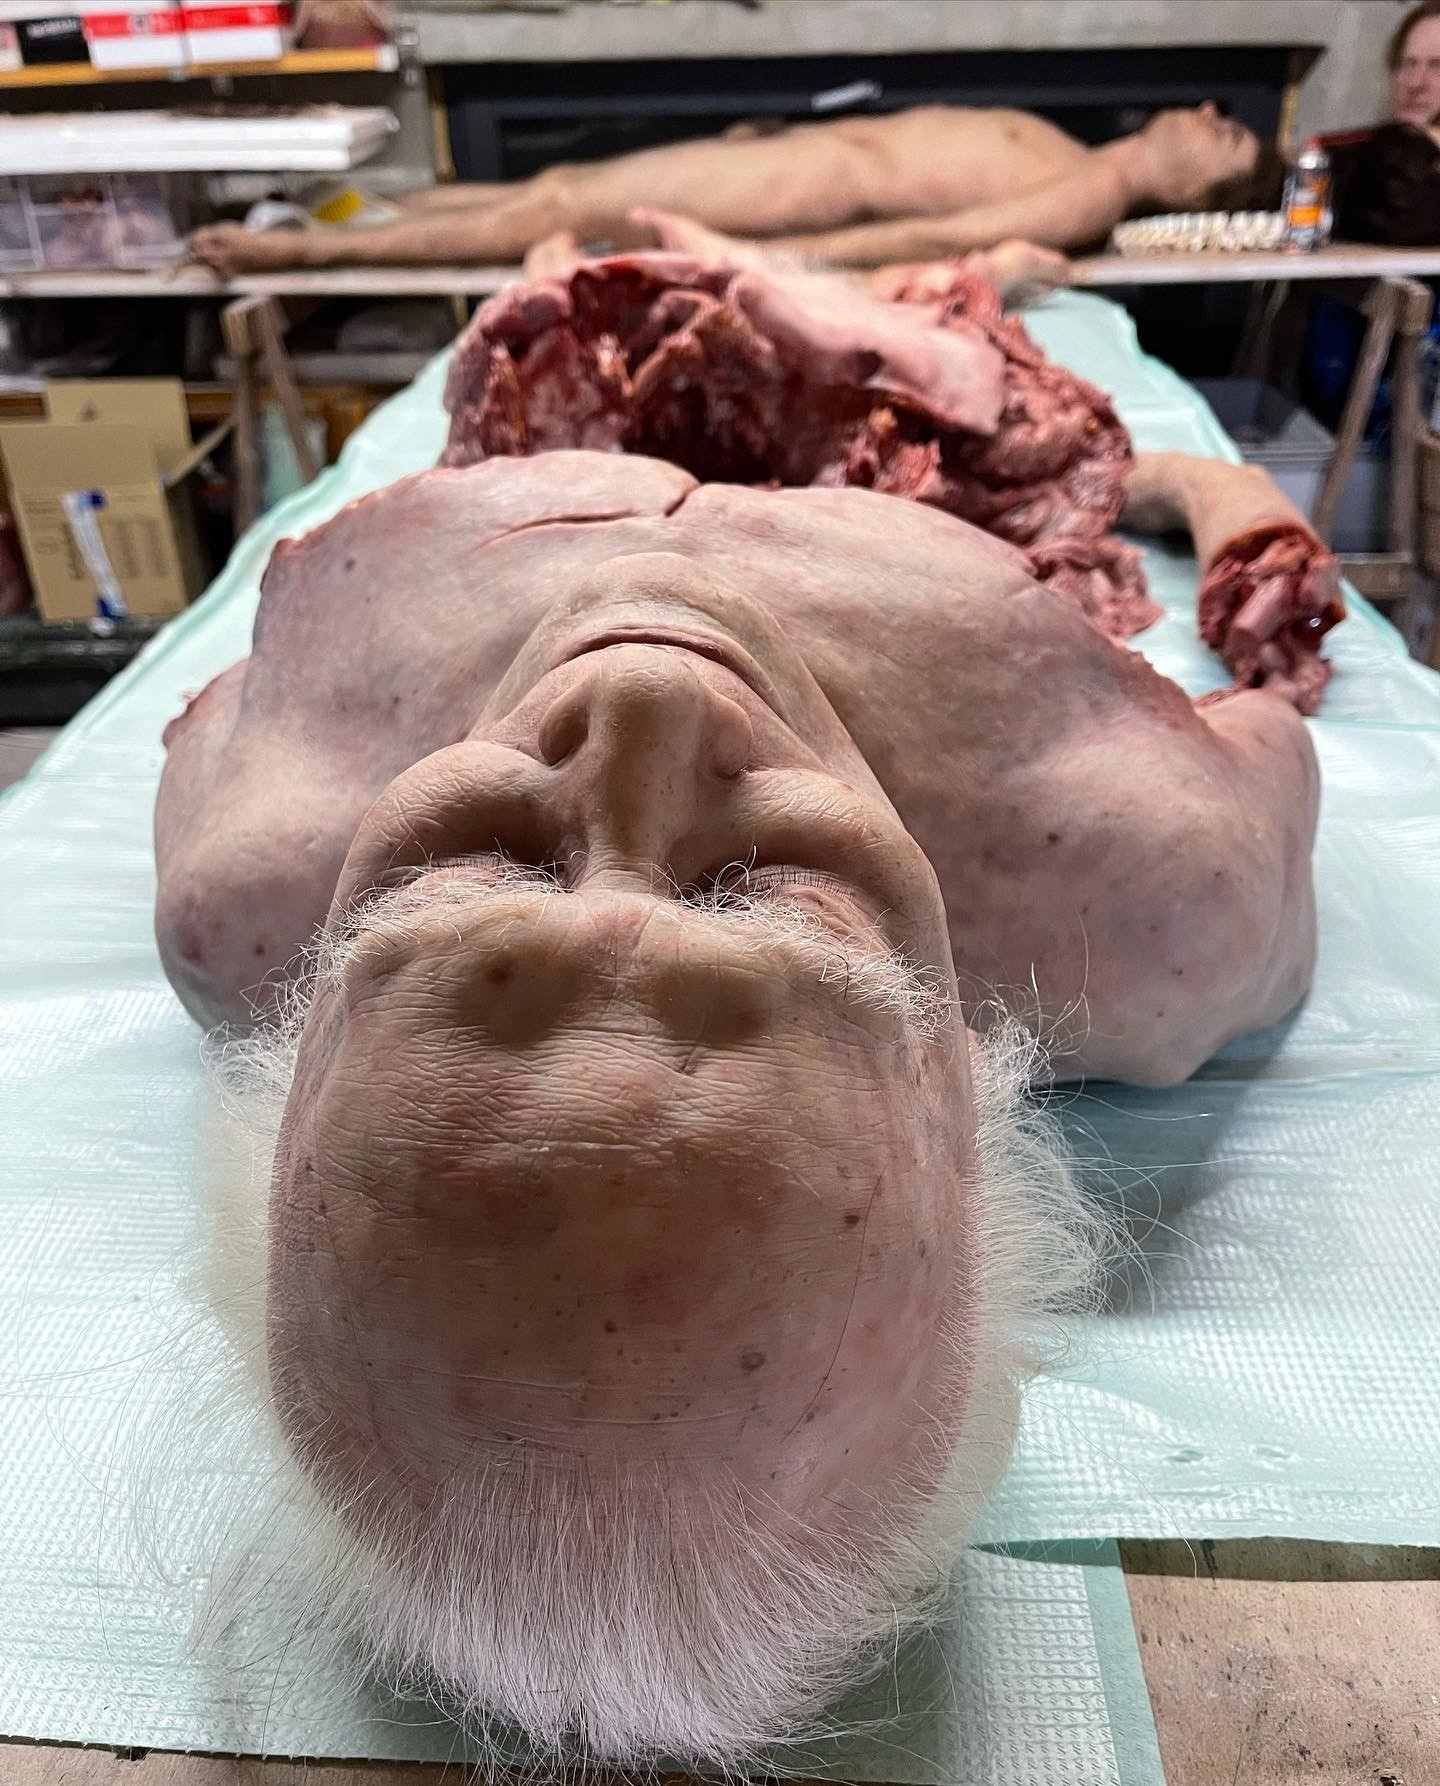
From there, the work moves into sculpting, mold making, material selection, pigmentation, edge design, and application planning. Silicone is often used because it reacts to light in a way that closely resembles real skin — it has depth, translucency, softness, and flexibility. But even with the right material, achieving realism requires careful control of edges, color transitions, texture, thickness, and subtle surface variation.
The sculpt is usually created with the final camera use in mind. A prosthetic designed for a wide shot can be broader and more graphic, while a prosthetic designed for close-up realism needs smaller details, softer transitions, more accurate anatomy, and believable asymmetry. Real skin is never perfectly uniform, so film prosthetics often include small imperfections, uneven tones, pores, broken capillaries, scars, discoloration, swelling, or dry texture.
Material choice depends on the required effect. Silicone prosthetics are often preferred for realistic skin, facial appliances, wounds, scars, burns, body parts, and close-up trauma effects. Foam latex may be useful for movement and larger character pieces. Encapsulated silicone appliances can create very thin edges for seamless blending. The right choice depends on the actor’s movement, shooting time, reset needs, budget, durability, and how close the camera will be.
Color is just as important as form. A prosthetic does not become realistic simply because it has a detailed sculpt. It must be painted and blended in layers, with attention to undertones, veins, redness, bruising, warmth, coolness, and how the material changes under lighting. On set, a color that works in the workshop may need adjustment once it meets the actual camera, lens, costume, makeup, and lighting environment.
Application on set is just as critical as the build itself. A well-made prosthetic can fail if it is not blended correctly, if the color does not match under actual lighting conditions, or if the edges lift during performance. Adhesives, removers, sealers, paints, powders, blood products, sweat, actor comfort, continuity photos, and reset time all affect the final result.
Close-up prosthetics also need to be designed for continuity. If a wound, scar, burn, swelling, or injury effect appears across multiple scenes, it must be repeatable. The same shape, color, placement, texture, blood level, and healing stage may need to be recreated over several shooting days. This is why documentation and on-set prosthetic supervision are essential in practical effects work.
Best production
For close-up work, practical prosthetics still offer an advantage over digital effects. They interact naturally with light and give actors something physical to respond to, which often results in a more convincing performance. When the prosthetic is applied directly to the actor, the camera captures real shadows, skin contact, surface texture, and small movements that are difficult to recreate from scratch.
A physical prosthetic also helps the director, cinematographer, makeup department, costume team, and VFX team make better decisions on set. Everyone can see how the effect behaves in the actual environment. The actor can feel it, the camera can test it, and the crew can adjust lighting, blocking, framing, or performance around something real.
This does not mean digital tools are unnecessary. CGI and digital cleanup can be extremely useful for removing edges, refining transitions, enhancing movement, adding small details, or supporting impossible transformations. But in close-up realism, a practical prosthetic often provides the most believable foundation. It gives the shot real texture, real depth, and real interaction before any digital work begins.
The most effective results often come from combining both methods. A practical prosthetic can carry the performance and surface realism, while digital effects can refine what the camera should not see. This hybrid approach is especially useful for facial transformations, creature makeup, injury effects, body horror, medical realism, and scenes where the effect must feel physical but still benefit from post-production control.
In the end, realism does not come from perfection, but from how well everything works together in front of the camera. The best film prosthetics are designed to disappear into the scene. They support the actor, respect the lighting, survive the shoot, match continuity, and make the audience believe that what they are seeing belongs naturally to the character or story.
For productions, the key question is not only “How detailed should the prosthetic be?” but “How will this prosthetic perform in the shot?” Close-up realism depends on sculpting, materials, color, application, actor movement, lighting, camera distance, and production planning. When these elements are aligned, practical prosthetics remain one of the strongest tools for believable visual storytelling.
For a close-up prosthetic example, see the trauma effect built for Znachor, or explore the full REDO SFX capabilities.
Blog posts
Explore even more insights from our workshop, from practical effects and prosthetics to on-set challenges and creative solutions. Learn how production-ready SFX, silicone models, creature effects, special effects props, medical simulation models, and hybrid practical-digital workflows can support stronger visual storytelling. Explore REDO SFX capabilities.

Get in touch with our team — we’d be glad to support your project.


